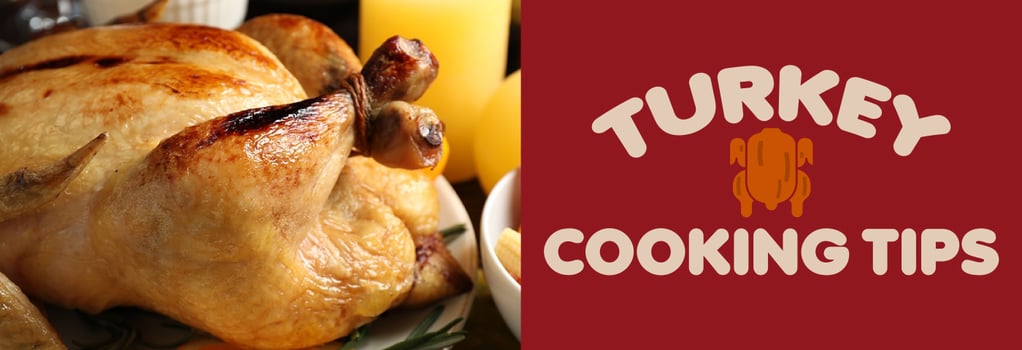
Roast, Fry, or Smoke: Best Ways to Cook a Turkey
When it comes to Thanksgiving (and sometimes Christmas), turkey is undeniably the most popular main course in the United States. Each year, more than 40 million turkeys are eaten during the Thanksgiving season alone, with another 22 million around Christmas and 19 million at Easter.1
Many of these birds are cooked whole to attain the classic presentation and flavor associated with the holidays, but cooking a whole turkey can be challenging. Different parts of the bird cook at different speeds, and, like many types of fowl, turkey meat can easily dry out or get chewy during the extended cooking period a whole bird requires.
The classic way to prepare a whole turkey is to roast the bird in an oven, but did you know there are different ways to cook a turkey? Along with roasting, deep frying or smoking a turkey are popular cooking methods enjoyed by many families during the holiday season. No matter which you choose, it's important to follow recommendations for prepping and cooking your bird to ensure it comes out moist, savory, and delicious. Below, we'll cover some tips to help you make the most of your meat and figure out, once and for all, the best way to cook a turkey.
How to Brine a Turkey
A basic brine is a mixture of salt and water, often with a bit of brown sugar. A good ratio for a basic brine is 1 cup of salt – opt for non-iodized or kosher salt for better flavor – per gallon of water. If you're concerned about sodium intake, you can reduce the amount of salt per gallon, but the brine may not penetrate the meat as deeply.
Popular turkey brine flavoring ingredients include apple cider, chicken stock, vinegar, wine, orange juice, lemon juice, and various herbs and seasonings. If you're unsure of what flavors to use, look for a pre-mixed brine base in your grocery store's spice section. Whatever you choose, remember to build your foundation of water and salt first, as the sodium chloride helps relax parts of the muscles that wouldn't otherwise absorb moisture.
Once all your brine ingredients are assembled, you'll need to combine them. The most common method is to add all the ingredients to a large pot over medium-high heat – stirring occasionally – until the brine is simmering. Stir the brine until all the salt is completely dissolved and the ingredients are thoroughly combined, then turn the heat off.
You must cool the freshly made brine to 39 degrees F or below before you put your turkey in it, either by leaving the mixture to cool overnight in the refrigerator or by adding ice to it. This step helps keep the meat chilled and out of the danger zone as it brines.
Plan to brine your turkey for 8 to 12 hours or overnight to allow plenty of time for the bird to absorb the flavors.
Brining Safety Tips
- Keep the bird in the refrigerator while you're making the brine, only bringing it out when you're ready to put it in the chilled mixture.
- If you don't have a pot or container large enough, you can brine your bird in a cooler with a lid that seals completely. Thoroughly wash your cooler with a solution of 1 part bleach to 10 parts water before and after brining the turkey to disinfect it. Make sure you rinse the cooler thoroughly to eliminate any bleach residue.
- Add plenty of ice to your brine once it's in the cooler or other container to ensure it stays chilled below 39 degrees. The bird must stay completely submerged, so you can place a clean casserole dish and/or a couple clean plates on top of the bird to weigh it down.
- Make sure the brining container's lid is sealed to keep out contaminants. Add ice to the container as needed to maintain a constant temperature of 39 degrees or lower.
How to Spatchcock a Turkey
One way to dramatically decrease your turkey's cooking time is to spatchcock, or "butterfly" it. If you're roasting or smoking your turkey, spatchcocking also ensures all the skin is evenly exposed to heat, making it easier to achieve uniform color and crispness. Anyone with a good sharp kitchen knife, cleaver, or meat shears can perform this extra butchery step during the prepping process.
To spatchcock a bird, you'll need to remove its spine and press it flat. Some quick spatchcocking guidelines are covered below.
- Remove all packaging, neck, giblets, and any butcher's twine or leg locks from the bird.
- Pat the turkey dry to reduce the danger of it slipping around unexpectedly as you're cutting.
- Feel around gently with your fingers to locate the turkey's back bone, then begin cutting from the tail. Using a sharp kitchen knife, cleaver, or kitchen shears, cut closely along one side of the backbone through the ribs and meat.
- Continue to cut all the way up the turkey until the ribs and backbone are fully separated, then repeat this cut on the other side of the spine.
- When both cuts are completed, remove the backbone; it should come away in one piece. Set the backbone aside with the neck/giblets, then flip the bird breast side up.
- Using both palms, press down firmly on the bird's breastbone. You should hear one or two sharp cracks as the bird flattens.
- Arrange the flattened turkey for cooking by splaying its legs and tucking in the wings to prevent the tips from getting burnt.
- Enjoy the ease of cooking a spatchcocked turkey!
How to Roast a Turkey
Roasting a turkey is the classic (and most popular) way to cook this sizeable bird. Requiring only an oven, roasting pan and a basting brush , this method is simple and doesn't typically involve any special equipment or preparation.
If you want to fill your bird with stuffing or add herbs and vegetables to the pan to cook along with the turkey, you'll need to roast it; fried and smoked birds are typically cooked alone, without stuffing, for safety reasons. Below, we'll cover some helpful tips on how to prep and cook your bird to a tender, golden-roasted state.
Turkey Roasting Tips
When roasting a turkey, it's important to take steps to ensure it cooks evenly and thoroughly without drying out. To begin, make sure you're choosing the right bird. Follow the advice below when shopping.
- Look for a turkey with a round, plump shape. Birds with flat spots may have been thawed and refrozen, which can diminish the flavor and potentially increase the chance of food-borne illness.
- Buy your turkey ahead of time, to have the widest selection and ensure you'll have enough time to fully defrost it before the big day.
- Decide in advance if you'll brine or inject the bird. A self-basting bird comes pre-brined and is easier to prep but isn't a good choice if you opt to use your own custom brine.
- For optimal turkey flavor, check the label. Look for heritage-breed birds, as well as birds marked free-range, cage-free, pasture-fed, or organic. Be aware that heritage breeds cook differently than their factory-farmed counterparts and typically have smaller breasts.
- Choose the right size. Consider the capacity of your refrigerator, oven, roasting pan, and any serving platters you plan to use, then make sure you select a bird that will fit.
How to Prep a Turkey for Roasting
Depending on the turkey and recipe you choose, prepping the bird can be quite simple or be detailed and complicated. Many people choose to brine or inject their bird for optimal moisture levels, keeping the meat tender and juicy as it cooks. Others may buy a pre-basted bird that's already been factory-injected with a saltwater solution. Either way, it's important to ensure the bird is prepped and plumped with as much moisture as it will hold.
To equalize the cooking speed of wings, legs, and body, many chefs truss their bird, meaning they tie its appendages down with butcher's twine so they stay tucked close to the body as it cooks. This is particularly helpful if you or one of your guests enjoy eating the wings, which can easily dry out and char during extended cooking times.
For the best flavor, it's a good idea to brine and/or dry rub your bird several hours in advance, if not the day before cooking. The more time the bird has to absorb a brine or spice mixture, the deeper the flavors penetrate into its flesh.
After the bird has been fully prepped, pat it dry with paper towels and store it uncovered in the fridge for a few hours or overnight. This gives the skin a chance to dry out in a cool, sanitary environment. While injecting and/or basting the bird keeps the flesh moist, it's also important to ensure the bird's skin is free of lingering moisture so it can get nice and crisp in the oven.
Turkey Roasting Time & Temperature
Since turkey is a fairly delicate meat prone to toughness when cooked too quickly, it's best to roast your bird in the 325- to 350-degree range. Cooking at a higher temperature may shorten the cooking time, but it's also likely to result in tough, chewy meat. Near the end of the cooking time, you can bump the temperature up to 425 degrees Fahrenheit to help crisp the skin, but monitor the turkey closely during this time to avoid burning.
When roasting an unstuffed turkey, plan for about 15 minutes per pound. If your turkey is stuffed, plan for about 20 minutes per pound. The best way to ensure your bird is done without being overcooked, however, is to use a meat thermometer. Using a meat thermometer is the only way to know the exact temperature of your bird. According to the USDA, turkeys (and their stuffing, if they have any) need to reach an internal temperature of 165 degrees Fahrenheit to ensure food safety. 2
If you don't have a meat thermometer at home, you can test the bird by piercing its flesh with a fork or knife and pressing the meat gently. If all the juices run clear, your bird is cooked.
How to Fry a Turkey
Roasting may be the penultimate classic, but that doesn't necessarily mean it's the best way to cook a turkey. Deep-fried turkey has become more popular than ever, leading to an increased number of people deciding to try their hand at turkey frying each year. Naturally, as greater numbers of people choose to deep fry – including many who aren't experienced with the process – accidents associated with turkey frying continue to happen. Such accidents are rare, but they have the potential to be disastrous, resulting in fires and serious injuries on occasion.
Despite this, the siren song of juicy, crispy fried turkey lures in new enthusiasts each year, and knowing how to avoid common mistakes is the first step in the journey. To help guide you in your quest for the perfect fried turkey, we've put together a list of safety tips for deep frying a turkey.
Turkey Frying Safety Tips
- Make sure your turkey is fully defrosted. Ice crystals can react explosively with hot grease, causing your fryer to boil over or worse. Plan ahead to ensure your bird has enough time to defrost completely.
- Do not deep fry your turkey indoors. It's best to fry your turkey in an open, well-ventilated area away from people and animals.
- Do not deep fry on your balcony. Serious injuries and fire can occur if the hot grease spills onto people or objects below.
- Do not fry on a wooden surface, such as a deck. If hot grease spills on wood, it can quickly catch fire and begin to spread.
- Do not deep fry your turkey if it's raining or snowing outside; even a few stray drops of moisture can cause your oil to bubble over if they land in your frying vat.
- Remove all flammable objects within reach of your fryer. Hot grease can drip or splatter onto nearby surfaces when the turkey is added or removed from the pot. Make sure to remove any objects, fabric, firewood, etc., that could catch fire.
- Keep a fire extinguisher at hand. Just like cooking in your kitchen, accidents can happen to even the most well-prepared chef. Locate your fire extinguisher and make sure it's placed where you can reach it.
- Make sure all children, friends, family, and pets are ten or more feet from the fryer. Even small splatters of hot grease can cause serious burns to skin, eyes, and fur.
- Do not overfill your fryer with oil. A general rule is no more than half-full. Always measure how much oil you need for your specific bird before turning on the heat.
How to Prep a Turkey for Frying
The first step in the turkey frying process is to choose the right bird. Turkeys weighing 10 to 15 pounds are the best choice for frying, as heavier birds are more difficult to handle, can cook unevenly, require more effort and equipment to prepare, and can cook significantly faster on the outside than the inside, leading to tough, burnt skin. It's important to note here that birds marked "self-basting" are pre-brined with a solution of water, salt, and sometimes other flavorings, so if you're wanting to brine or inject your turkey yourself, avoid this label.
If you purchased a frozen bird, you'll need to calculate how much time it needs in the fridge to thaw completely. A good rule of thumb is to allow 24 hours of thawing time for each 4 to 5 pounds of weight.3 For a 15-pound bird, that adds up to three days. After your bird is fully thawed, remove any innards, pop-up thermometers, or plastic pieces.
At this point, if you choose to inject your bird with brine, this is the time to do it. This step is not necessary; it just comes down to personal preference. Those who are comfortable with preparing a turkey sometimes enjoy creating and injecting their own flavorful brines, while those who are new to the process may prefer to keep things simple with a pre-brined bird.
Some people choose to dry-brine the bird by rubbing it with a generous coating of salt and spices and letting it sit in the fridge for several hours to soak in. If you choose to follow this method, you'll want to wipe off excess spice mixture prior to placing the bird in the fryer, as herbs and spices can quickly burn in hot oil and affect the flavor of the finished meat.
As mentioned before, the equipment for frying must be located outdoors. If you don't have a fryer, you can simply use a large, sturdy stock pot filled with oil and placed over a safe heat source. To guarantee the proper amount of oil for frying your turkey, you can conduct a simple test with water. Fill the fry pot with water and lower the turkey in. If the water covers the turkey with several inches remaining above the water line for splashing, you have properly filled the pot. Once you are satisfied with the level, remove the turkey, take note of the fill line on the pot, drain the water, and dry the pot thoroughly.
Turkey Frying Time & Temperature
When the pot is completely dry, fill it with oil to the previously measured level and bring the oil up to your preferred cooking temperature. If frying a whole turkey, you should keep your oil between 340 and 375 degrees Fahrenheit to optimize cooking time and avoid excessive oil absorption.4 When the oil has reached the proper temperature, slide the turkey onto the turkey rack with the legs pointing into the air, connect the lifting hook, and slowly lower the turkey into the oil. Wearing foodservice gloves and arm sleeves can protect your skin from small pops and splatters of grease during this process.
Once in the fryer, monitor the oil's temperature to make sure it does not dip below 340 degrees or exceed 375 degrees. Your turkey will need to cook for 3 to 4 minutes per pound – a much shorter time than a traditional oven-cooked bird. Using a fryer thermometer is the best way to precisely monitor oil temperature as the bird cooks.
Once your turkey has reached the end of its cook time, remove it from the oil and insert a meat thermometer into the thickest part of the thigh. Be sure the probe doesn't touch the bone, which will get much hotter than the surrounding meat. The temperature should reach a minimum of 165 degrees Fahrenheit. After the turkey has cooked, allow it to sit for 30 minutes before carving to ensure it retains its moisture and tenderness.
How to Smoke a Turkey
While "big turkey" would have the bird be the center of any holiday meal, for some families it has become more of an obligatory item than food such as stuffing or macaroni and cheese that they tend to look forward to. The turkeys themselves can’t be blamed: Breeding for bigger birds and amateur cooks have frequently relegated them to being labeled as a bland, dry, chewy meat. Whole fowl is always a bit tricky to cook because of the varying types of meat, bones, and skin on a bird carcass; the extended time required to cook a sizable fowl like a turkey doesn't help.
To address those issues, many people decide to smoke their birds. Smoking is a gentle cooking method that helps keep the bird moist while imparting fantastic flavor when done correctly. If you've made that choice yourself, read on for tips on producing a bird that is moist and flavorful.
Tips for Smoking a Turkey
- Choose a bird around 12-14 pounds. Anything bigger will take too long to cook, potentially leaving the interior portions of the bird in the food “danger zone” long enough for bacteria to proliferate. If you need to feed a crowd, it's better to buy two medium turkeys instead of one really big bird.
- Don't stuff the turkey. Smoking is a low and slow method of cooking that takes hours to fully penetrate the bird's flesh. Adding stuffing insulates the bird's interior, which slows cooking. By the time your stuffing is done, the bird's meat will be dry and overcooked.
- Choose mildly flavored wood chips. Turkey pairs well with cherry, peach, or apple wood chips, but can be overwhelmed by stronger flavors such as hickory or mesquite. Some people like to blend two different types of wood chips together, adding some oak or pecan chips for a slightly stronger flavor that won't obscure the meat.
- Use a drip pan. Always place a drip pan underneath your turkey to prevent flare-ups. In addition to being dangerous, flare-ups can leave your bird with an unpleasant, charred flavor.
- Use a rotisserie attachment if you have it. Smoking the bird rotisserie style helps ensure uniform flavor and doneness. If you don't have a rotisserie attachment, spatchcocking the bird and flipping it halfway through cooking can also help it cook more evenly.
How to Prep a Turkey for Smoking
Check carefully for and remove any binders, twine, or pop-up thermometers. Unlike tender turkey meat, string and plastic do not taste better smoked, so carefully removing all inserts, giblets, and packaging prevents your bird from absorbing the taste of burning plastic as it cooks.
Make sure your bird is brined. Many turkeys offered in the grocery store are pre-brined, a fact that will be indicated with a label saying something similar to "Contains up to X% of a salt solution." Other labels include "self-basting" and "pre-brined." If you're wanting to brine the bird yourself to achieve a specific flavor, you'll want to look for an all-natural bird that hasn't been prepped at the factory. Either way, brining is a non-negotiable step when you're getting ready to smoke a turkey. It can take several hours to smoke the bird, and brining helps prevent the flesh from drying out.
Choose a spice rub that complements a smoky flavor, and use it generously. Turkey is a mild-flavored meat that absorbs flavors well but can be bland if it's under seasoned. For best results, apply the rub inside the turkey and under the breast skin as well as the exterior, and let the bird rest, uncovered, in the refrigerator to dry and absorb the spices.
Pat the turkey dry with paper towels and/or let it dry in the fridge for a few hours before cooking. Once the bird is brined, the meat should be packed with moisture, but that also means the skin can get pretty soggy. Letting a brined bird dry in the fridge for a little while helps dry out the skin without drying the meat. Dry skin is more likely to crisp up and provide a delicious texture and flavor than skin that's still wet when it starts to cook.
Turkey Smoking Time & Temperature
Turkey can be smoked at temperatures as low as 225 degrees Fahrenheit, but smoking at a very low temperature can make the skin rubbery and extend cooking time much longer than needed. Your best bet is to cook your bird in the range of 250 to 325 degrees Fahrenheit, although you can bump that up as high as 350 for larger birds or to shorten the cooking time.
Smoking a turkey is one of the slowest cooking methods, and it can take 20-40 minutes per pound depending on the temperature you choose. For a 10-pound bird at 250 degrees Fahrenheit, you can expect to be cooking for five to seven hours; a 15-pound bird can take as long as 10 hours to cook. Since smoked turkey flesh often remains pink even when it's cooked, the best way to figure out when it's "done" is to use a meat thermometer. All poultry must be cooked to an internal temperature of 165 degrees Fahrenheit to comply with food safety regulations, and a meat thermometer can let you know precisely when the bird has reached this temperature.
Roasting vs Frying vs Smoking Time & Temp
| Method: | Roasted Turkey | Fried Turkey | Smoked Turkey |
| Temperature | 325-350 degrees F | 340-375 degrees F | 250-325 degrees F |
| Time | 14-20 min/lb. | 3-4 min/lb. | 20-40 min/lb. |
| Equipment | Oven, roasting pan | Deep fryer, frying rack | Smoker, wood chips |
References
- Turkey Facts. University of Illinois Extension. Accessed December 2022.
- Cooking Meat: Is It Done Yet?. USDA. Accessed December 2022.
- How to Safely Thaw a Turkey. U.S. Department of Agriculture (USDA). Accessed December 2022.
- How to Deep Fry a Turkey. Heinen's Grocery Store. Accessed December 2022.
